めもめも

このブログに記載の内容は個人の見解であり、必ずしも所属組織の立場、戦略、意見を代表するものではありません。

Reinforcement Learning 2nd Edition: Exercise Solutions (Chapter 2 - Chapter 5)

Reinforcement Learning: An Introduction (Adaptive Computation and Machine Learning series)

Reinforcement Learning: An Introduction (Adaptive Computation and Machine Learning series)

Chapter 2


Sample code for the multi-armed bandits

github.com

Chapter 3


Sample Notebook for Gridworld example

github.com

Chapter 4


Sample code for the Jack's car rental problem

github.com

github.com

github.com

Exercise 4.8

Since p<0.5, if you keep playing with a constant bet, you will eventually lose in average. So, at some points, you need to bet enough to win at once. In this particular case, the player decided to bet 50 when he/she has 50, and to bet 25 when he/she has 75 (hoping to win with this bet). Similarly, the player decided to bet 25 when he/she has 25 to reach 50 (hoping to win at the next bet).

Exercise 4.9

github.com

Exercise 4.10

\displaystyle q_{k+1}(s,a) = \sum_{s',r}p(s',r\mid s,a)\left\{r+\gamma \max_{a'}q_{k}(s',a')\right\}

Chapter 5

github.com

Exercise 5.12

github.com

Google Colaboratory を用いた演習環境の準備手順(TensorFlowによるニューラルネットワーク入門編)

はじめに、Google アカウント(Gmail アカウントと同じもの)を取得しておいてください。

Google Colaboratory にアクセスして、新規ノートブックを開きます。


コード用のセルで次のコマンドを実行して、Google Driveをノートブックの実行環境にマウントします。

from google.colab import drive
drive.mount('/content/gdrive')

「このノートブックに Google ドライブのファイルへのアクセスを許可しますか?」というポップアップが表示されるので、「Google ドライブに接続」をクリックします。さらに、Google ドライブのアカウントを選択すると「Google Drive for desktop が Google アカウントへのアクセスをリクエストしています」というポップアップが表示されるので、「許可」をクリックします。

Google ドライブがマウントされると、「Mounted at /content/gdrive」というメッセージが表示されます。

コード用のセルで次のコマンドを実行すると、ノートブックが Google Drive にダウンロードされます。

%%bash
cd '/content/gdrive/My Drive/Colab Notebooks'
git clone https://github.com/enakai00/colab_tfbook.git

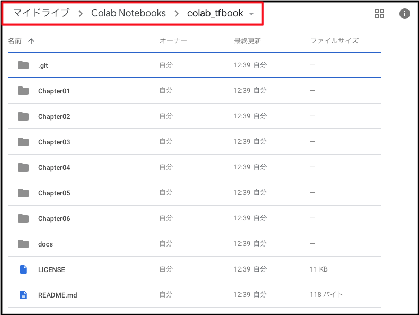
Google Drive の下図の場所にフォルダーができていることを確認します。(見つからない場合は、数分待ってから、ブラウザーの画面をリフレッシュしてください。)

ノートブックを開く際は、右クリックのメニューから「アプリで開く」⇒「Colaboratory」を選びます。

ここでは、動作確認用に「Chapter01/1. Least squares method with low-level API-2.ipynb」を開きます。(末尾が「API.ipynb」ではなく、「API-2.ipynb」の方ですので、注意してください。)

メニューから「編集」⇒「出力をすべて消去」を選択すると、既存の実行結果が消去されます。

メニューから「ランタイム」⇒「すべてのセルを実行」を選択すると、すべてのセルが上から順に自動実行されます。

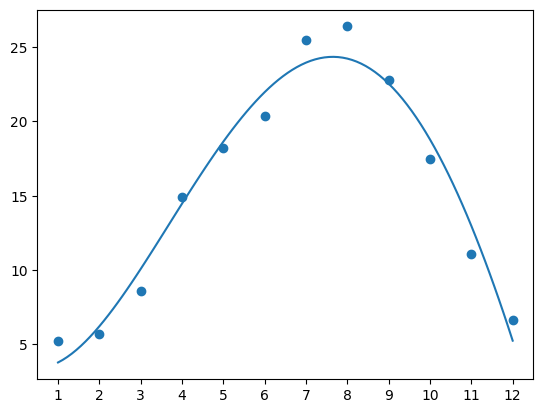
すべてのセルが正しく実行されることを確認しておいてください。たとえば、最後のセルでは、次のようなグラフが表示されます。